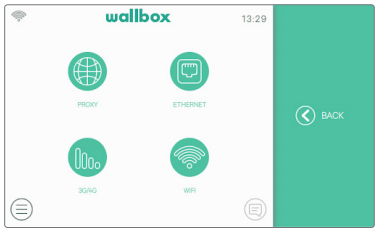
Three options are available to provide internet access to Commander 2:
- Ethernet,
- Wi-Fi,
- 3G/4G (optional feature, requires an accessory).
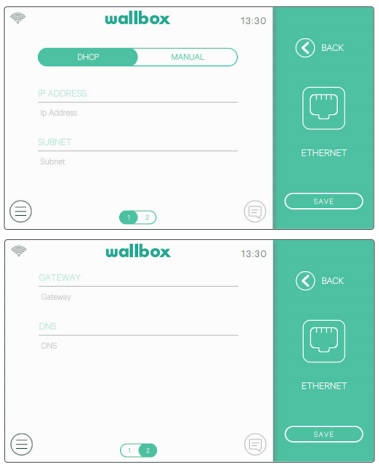
1. Ethernet
Automatic network configuration is enabled by default in this option via DHCP, so the charger will obtain and set the network parameters automatically, provided that the network has an active DHCP server.
It is also possible to set these network parameters manually.
2. Wi-Fi
To connect the charger to a Wi-Fi network, it is necessary to switch on the charger’s Wi-Fi connection by pressing the Enable button.
Then select the network you want to connect to from the dropdown list of available networks and enter the password for the Wi-Fi network. Press the Save button to save the configuration and connect.
The charger will connect to the network, and the Wi-Fi icon will be displayed. The number of bars on the icon indicates the quality of the connection.
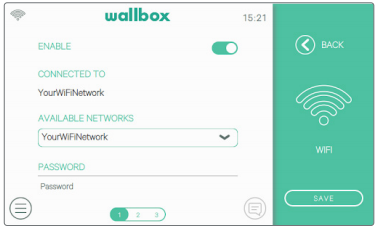
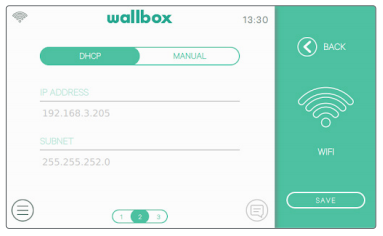
The network parameters are obtained automatically from the DHCP server or can be entered manually.

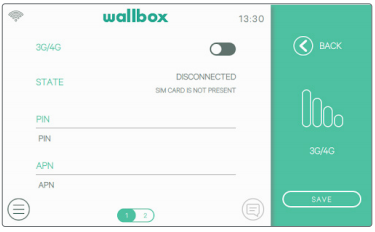
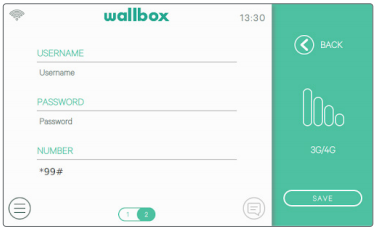
3. 3G/4G
If the charger is equipped with a 3G/4G dongle, it can be configured on this screen.
Switch on the 3G/4G connection and enter the configuration parameters provided by the SIM provider. Then press the Save button to save the configuration and start the connection process.
Once a connection to the mobile network is established an icon will be displayed in the top-left corner. Note that this icon is static and does not indicate the quality of the connection.
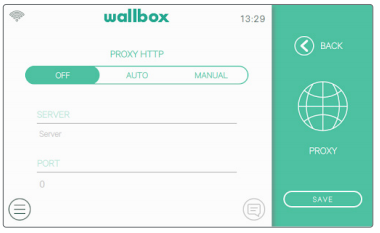
4. Proxy use
The charger can be configured to use a proxy server. By default, this option is disabled. To enable this feature, press Auto or Manual in the Proxy panel. For Auto, you only need to enter the proxy server address. For Manual, you will also need to enter the proxy server port. Tap the Save button to save the configuration.
Troubleshooting
Your Ethernet connection is not functioning properly? Typically, this issue can be resolved following our troubleshooting steps.