1. Introduction
Wallbox always wants to provide its customers the best products, services and user experience. A very important part of this user experience is the Wallbox app and the Wallbox portal.
Both the app and the portal allow the customer to have full control of their charging experience, collecting charger session information, statistics, consumption, users, etc. This allows all our customers to have full management of their energy consumption and cost savings related to electric vehicle adoption.
The Wallbox portal has the capability to integrate a payment platform in order to directly charge your potential customer/users for every use of your charging infrastructure. Following you will find the instructions manage your charging infrastructure in case you have payment platform integrated.
Wallbox currently offers three software plans: Basic, Standard, and Business. Wallbox Basic and Standard plan customers cannot currently use the automated payment systems or QR-based micropayments facility. Only Wallbox Business plan subscribers can enjoy completely automated payment systems with QR-based micropayments facility.
2. Charger Settings
In order to be able to make payments in the chargers, you’ll have to configure them for public charging. To do this enter the portal or mobile app and add a charger on the Wallbox platform.
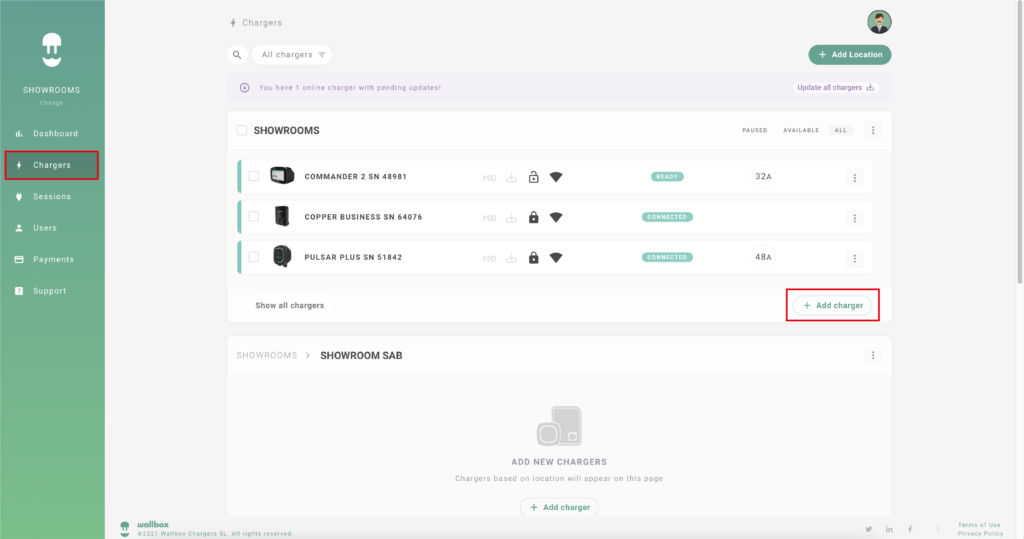
3.1 Add a charger
- From the section “Chargers” click “Add Charger” (lower right button)
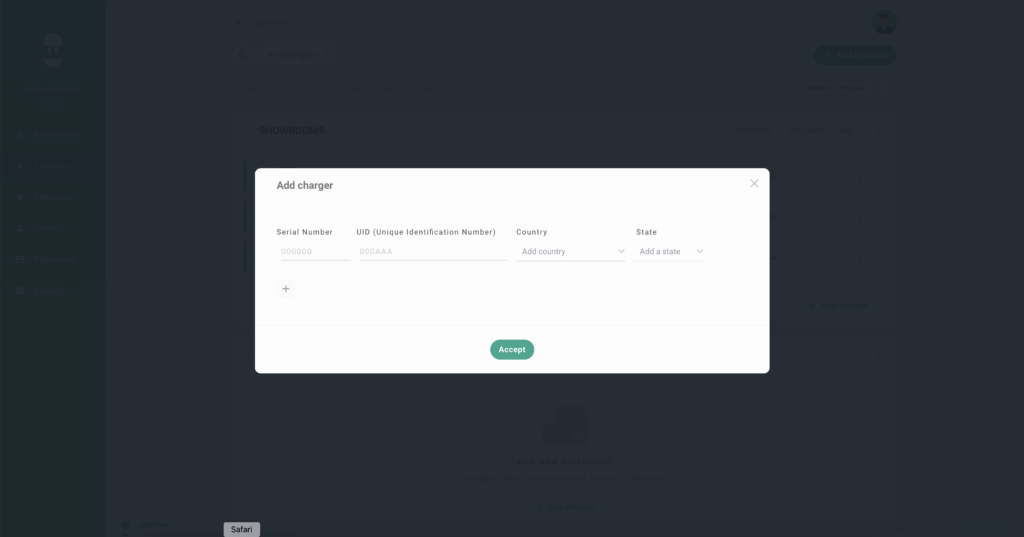
2. Enter the SN of the charger, UID code, country and state where the charger is installed.
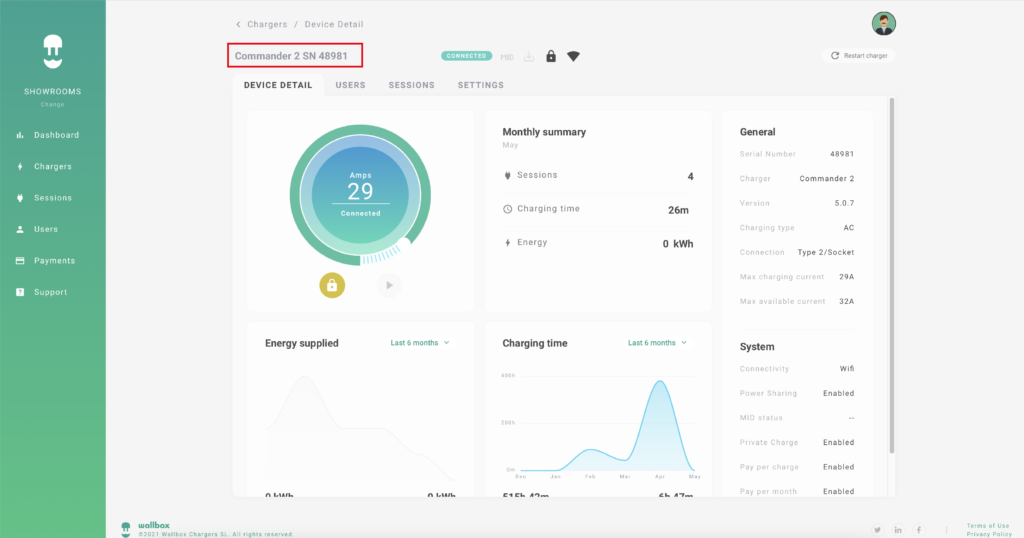
3.2 Set the charger name
After adding the charger, you can set the name of the charger. Chargers are named by their model name followed by the serial number. You can quickly edit the charger name by clicking on the pencil symbol next to it.