EV Charging Cable Replacement
Follow the steps below to replace the EV charging cable:
- Turn off the circuit breaker to the 240V outlet.
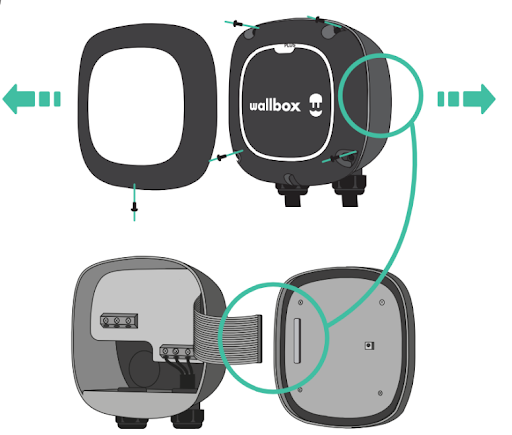
- Remove the cover frame from the front of your charger by removing the bottom screw that affixes the frame to the cover.
- Remove the four corner screws on the cover and carefully lift the cover.
- From the cover, carefully detach the ribbon cable. Set the cover aside.
- Remove current charging cable wires from the output terminal section on the high-voltage board by removing L, L2 and Ground.
- Loosen the secure nut from the inside of the charger using a wrench (metric M32).
- Guide wires out of the bottom hole in the charger.
- Insert the new wires of the charging cable through the bottom hole of the charger.
- Insert new charging cable wires into designated slots and tighten (1,2Nm) L1(black), L2 (red) and Ground (green).
- Attach the nut inside the charger to the new cable gland, secure it in place and tighten it with a torque wrench (5 Nm).
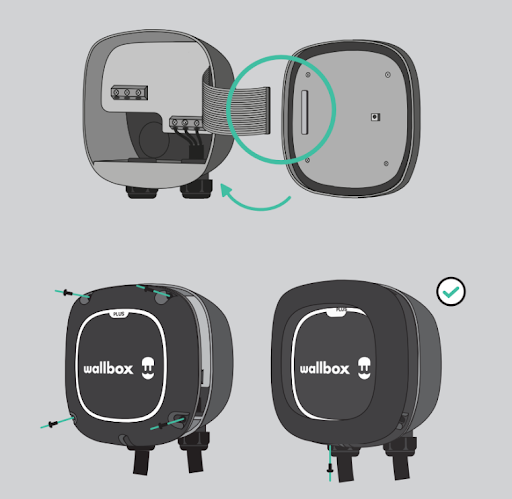
- After installing, carefully reattach the communications cable to the charger and close the cover. Ensure the connector is securely connected.
- Insert the four corner screws to secure the charger cover. Do not over-tighten.
- Place the cover frame on the charger and attach it to the wall screw.