THIS FEATURE IS NO LONGER SUPPORTED
The Wallbox Voice Assistant lets you control and manage up to 4 Wallbox chargers. You can get to know your charger status, start or stop a charging session, lock or unlock your charger, set a charging schedule, and more.
1. Setting up the voice assistant
a. Using Google Assistant
Before setting up the assistant, ensure that you have downloaded the Wallbox app on your mobile device, created a Wallbox account, registered your charger and connected it to the internet. In addition, make sure that you are using your personal and not a business account.
If you are using a business account, you need to go through these steps to use Google Assistant with your charger:
- Go to your Google account settings.
- Then go to Privacy & Personalization.
- Go to History settings.
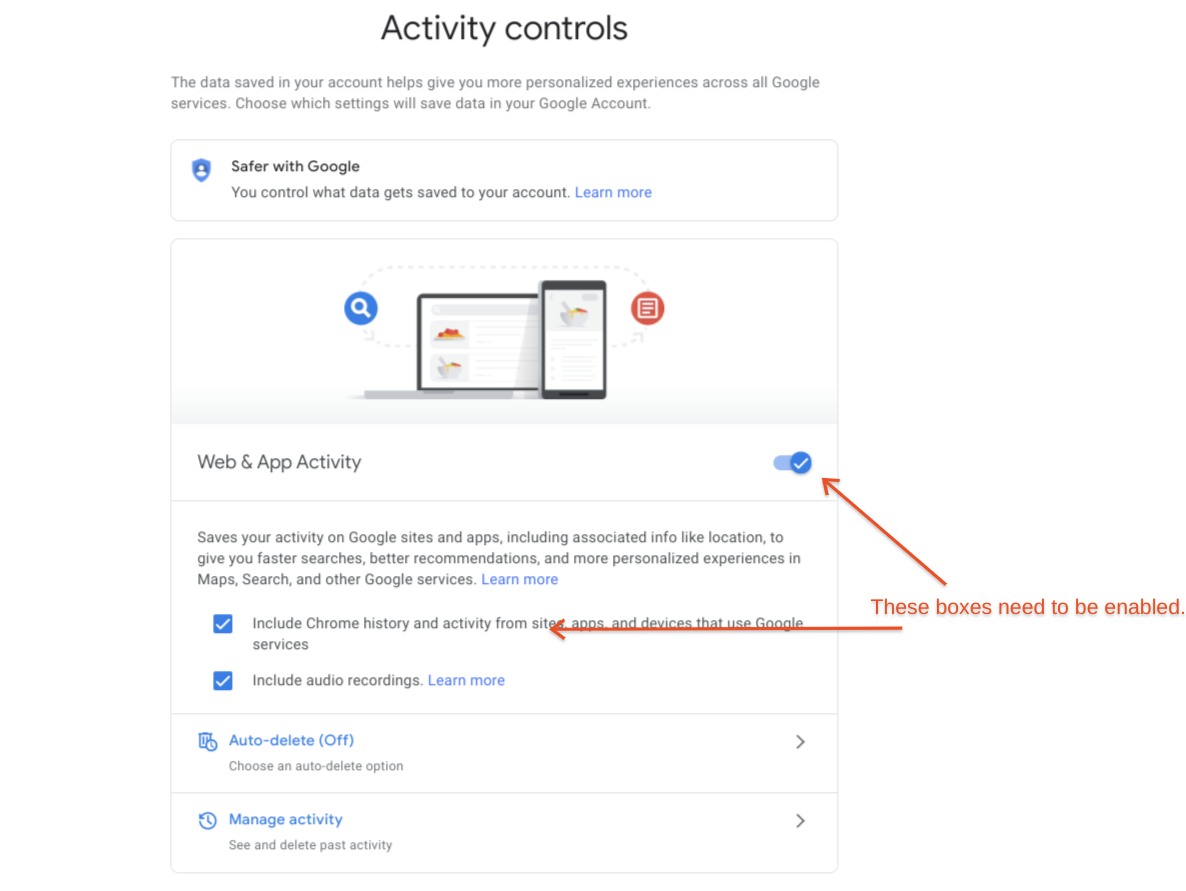
- Select Web & App Activity and make sure you have the activity controls set as the screenshot illustrates:
Once you are set up with the pre-requirements, you can enable the Wallbox action on Hey Google or simply invoke the voice assistant saying “Hey Google, talk to Wallbox” and request an action (i.e., unlock my charger).
b. Using Alexa
Before setting up the assistant, ensure that you have downloaded the Wallbox app on your mobile device, created a Wallbox account, registered your charger and connected it to the internet.
Once you are set up with the pre-requirements, you must enable the Wallbox skill on Amazon Alexa.
Finally, you need to link your Wallbox account to your Amazon account. To do so, invoke Wallbox’s assistant (refer to the section “Starting an interaction”) and request any action related to your charger (i.e., unlock my charger). The assistant will answer by saying that it has sent you a card in the Alexa app. Open the Alexa app, select the card and follow the indicated steps.
2. Starting an interaction
How to interact with Google and Alexa
In order to use either Google Assistant or Alexa, you must always start by invoking the assistant. Once the assistant has opened the Wallbox action/skill, you can use any of the commands listed in “Starting an interaction”.
Only in Google, once the assistant has carried out the action, if you want to carry out a second one, you must re-invoke the assistant again and request the action.
“Hey Google, talk to Wallbox”
“What are my charging costs ?” or,
“How much time have I spent charging my EV?”
“Contact the Customer Support”
“Hey Google, talk to open Wallbox and tell me my charger status” or any of the commands above