1. Configuring the Wi-Fi Connection of your Charger
Note that you do not require an active Wi-Fi connection to use your charger, however connecting your charger to Wi-Fi will enable additional features, including voice control via your Amazon Alexa or Google Assistant-enabled smart devices.
When both connections are available, you can use either Bluetooth or Wi-Fi to manage your charger.
After successfully connecting to your charger via Bluetooth follow these steps to connect to your Wi-Fi network:
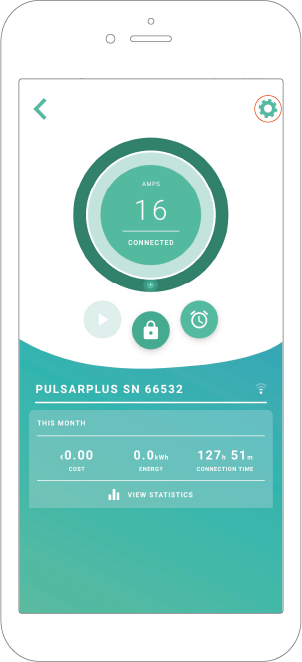
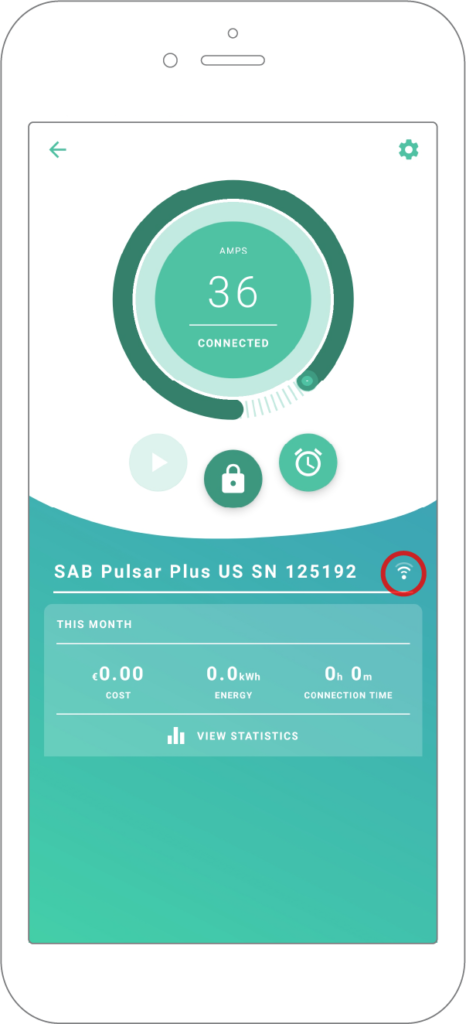
- Tap the gear icon in the top right corner to go to Configuration.
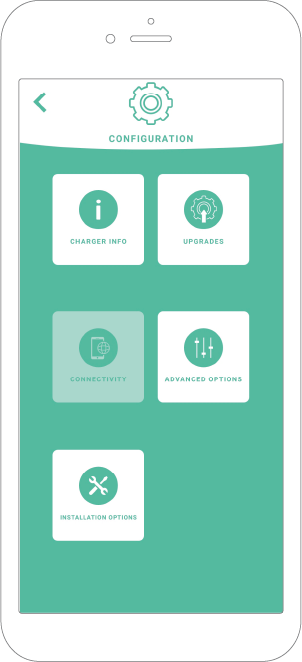
- On the Configuration screen, tap the “Connectivity” icon then tap “WIFI”.

- Enable the Wi-Fi toggle to activate the Wi-Fi connection. Wait several seconds until the network list appears.
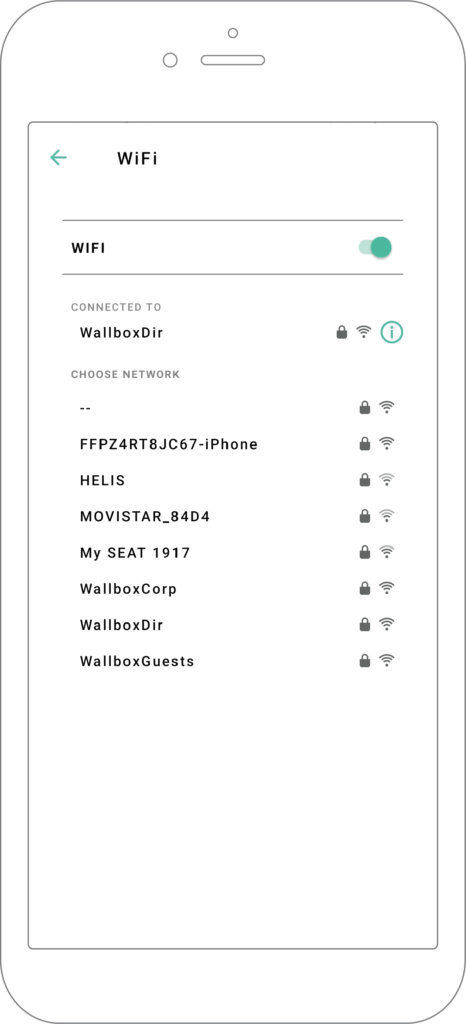
- From the network list, tap on your network and enter your network password when prompted. It can take up to 30 seconds to establish the Wi-Fi connection.
- The charger view and the charger list will now show an active Wi-Fi symbol.
- If you need information about the Wi-Fi connection or would like to configure a manual connection, tap the (i) icon.
Next: Basics: Usage