Wallbox Help Center

Type in a keyword or a question to find related content

Adding your charger to myWallbox

A. Adding my charger using the QR code method

  1. Log into the myWallbox app by filling in your credentials, or register if you do not have an account yet.
  2. Click on “I already have a charger” to start adding your charger to your new Wallbox account.
1@300x
 
  1. If you already own a Wallbox charger, scroll to the right side until you can select the “+” icon displaying in the middle of your screen (left image below) or just click the “+” icon on the bottom right corner of your screen (right image below).
Asset 19@300x
Asset 20@300x
 
  1. Scan the QR code placed on the left lateral of your charger. In case there is an issue with the QR code, click the ADD MANUALLY option and use the second method detailed in this article. 
Asset 21@300x
Asset 22@300x
 
  1. Verify if the Serial Number, UID, Country, and state or region are all matching your charger information and click the CONFIRM button. In case any field is missing, fill it manually and then click CONFIRM.
Asset 23@300x
 
  1. Your charger shall now appear in your myWallbox account charger’s list!

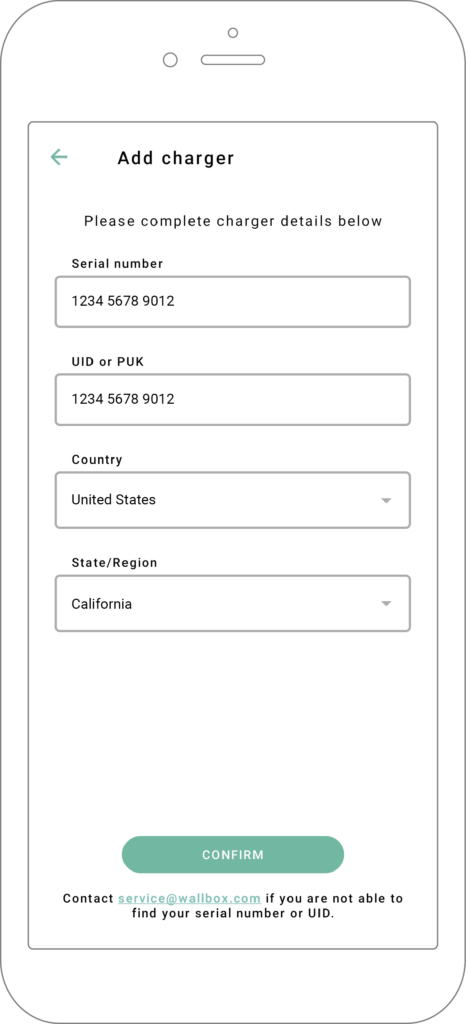
B. Adding my charger using the SN and UID 

  1. Log into the myWallbox app by filling in your credentials, or register if you do not have an account yet.
  2. Click on “I already have a charger” to start adding your charger to your new Wallbox account.
1@300x
  1. On the “Add Charger” screen, add the serial number and UID number for the charger you are registering.

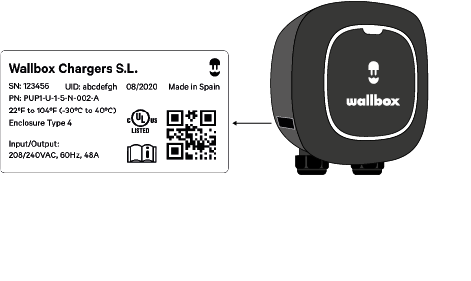
Your charger´s serial number and UID are located on the product label placed on the side of your charger:

  1. Ensure that the location setting is correct for your state/province.
  1. Tap ADD.

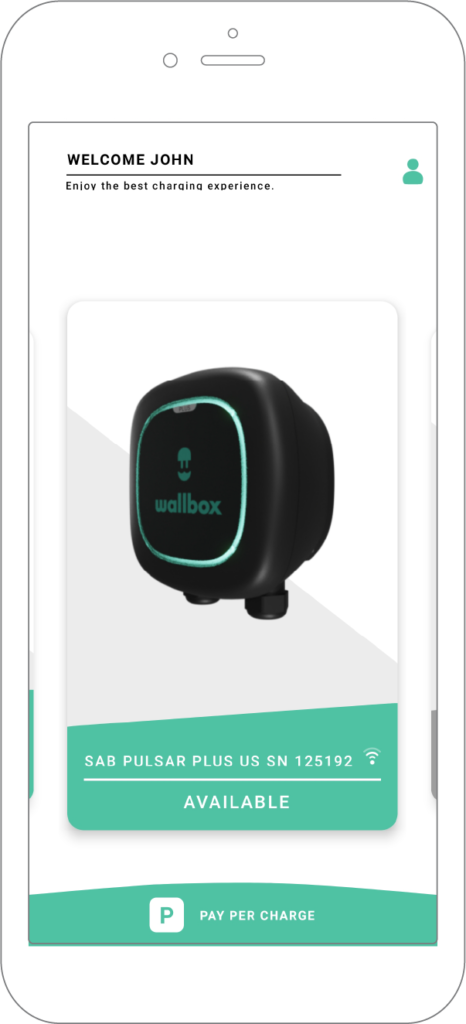
The charger will now appear in your charger list.

NextConnecting to your Charger

Updated on 25/02/2022

Was this article helpful?

Related Articles