A “MID meter” is a power meter device that allows you to record the energy consumption of a charging installation or a specific charger in conformity with the Measuring Instruments Directive (MID). It, therefore, provides Wallbox chargers with a more precise way of measuring energy consumption.
1. Before starting
Wallbox currently supports two MID-certified power meters. They can be directly purchased on our online shop:
- Three-phase MID power meter, three-phase installations (< 65A)
- Single-phase MID power meter, single-phase installations (< 100A)
We recommend using STP cat 5E cable to perform the installation.
To finalize the configuration of the MID meter, you will need to download the myWallbox app and create an account.
2. Supported chargers
The following chargers are compatible with MID metering:
- Commander 2,
- Commander 2s,
- Pulsar Plus,
- Pulsar Max,
- Copper SB,
- Quasar.
3. Installing the MID meter
Electrical wiring
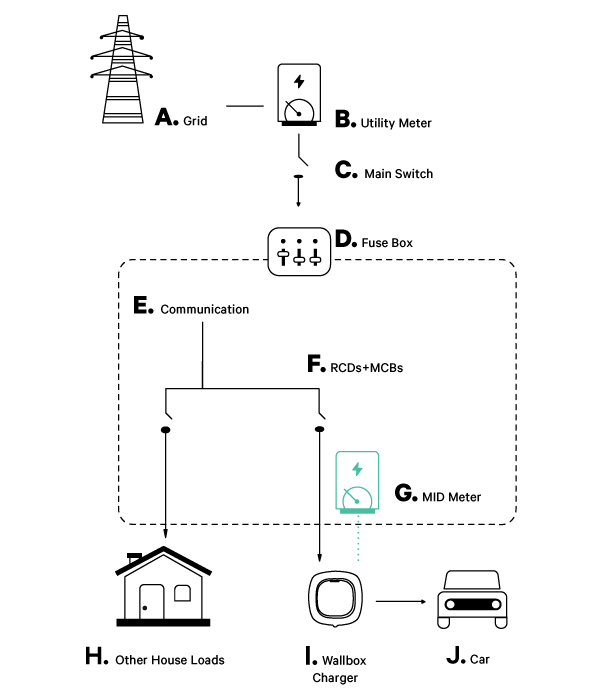
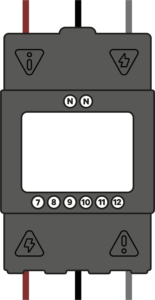
The MID meter should always be placed after the RCDs and MCBs on the charger’s power line (MID meter represented as position F on the installation diagram below).
Communication installation
You can choose one of the following communication installations schemes according to the logistical limitations of your charging infrastructure:
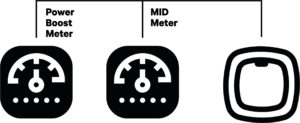
- Bus line installation: the bus line installation is recommended when the Power Boost (PB) and the MID meters are close. It is possible to create a communication bus with only one cable wired to the RS485 connector.
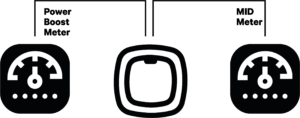
- Two lines installation: If the PB and MID meters are physically far from each other, you can opt for two different connection lines. Both will start and connect to the same point on the RS485 charger connector.
Both three-phase and single-phase installations will be separately described below.
A. Three-phase MID meter installation
Please note that for further help, you may want to refer to the installation guide included with your MID power meter model.
Connecting the charger to the meter
- Start by connecting the MID meter to the charger using the recommended STP cat 5E cable.
Wiring the power meter
- Then wire the power meter. Connect the 3 phases (position 1-2-3 for power in, 4-5-6 for power out).
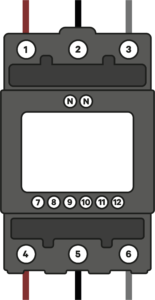
- Verify that the phases are firmly anchored. Install the insulation plate on top of the screws.
IMPORTANT: Loose screws can create a fire hazard!
- Install the neutral (in the case of bigger cable cross-sections you will need to downsize the neutral to fit the power meter).
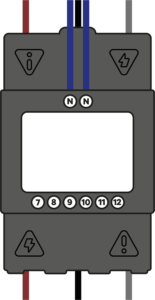
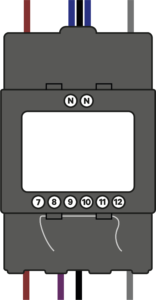
- Install the STP communication cable according to the diagram.
NOTE: For the communication line between the power meter and the charger, we recommend using an STP Cable cat 5E or higher. The total cable length cannot exceed 500 m.
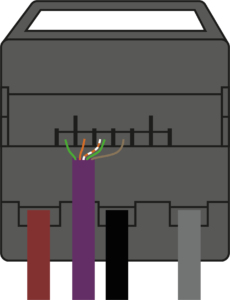
IMPORTANT: DO NOT use one twisted pair for each connection — Untwist the cables before connecting them separately. You may use a cable off-cut to perform the loop between positions 7 and 9.
- Finally, install the cable covers to secure your installation. If applicable, seal the covers with the cables provided according to local regulations.
Wiring the charger
- Wire your charger following the instructions of your charger’s installation guide.
Termination resistance activation
- Pulsar Plus, Commander 2 and Copper SB have two different termination resistances. The one devoted to MID and PB meters is marked as “RS485”:
- For BUS LINE INSTALLATION: place the charger’s RS485 switch on the T position. Only the POWER BOOST meter has to be wired to the resistance termination.

- For TWO LINES INSTALLATION: place the charger’s RS485 switch on NT position and wire the termination resistance bridge to both the MID and PB meters.

Current selector configuration
- The MID meter is correctly installed. You now need to configure it through the myWallbox App, following the explanations in the corresponding section of this article.
B. Single-phase MID meter installation
Please note that for further help, you may want to refer to the installation guide included with your power meter model.
Connecting the charger to the meter
- Start by connecting the MID meter to the charger using the recommended STP cat 5E cable.
Wiring the MID power meter
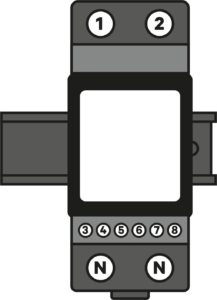
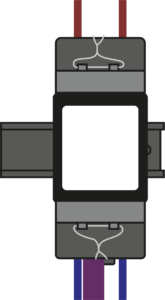
- Install the MID power meter on the DIN rail.
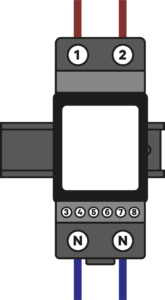
- Install the phase and neutral.
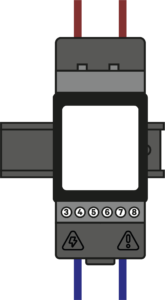
- Verify that the phase and neutral are firmly anchored. Install the insulation plate on top of the screws.
IMPORTANT: Loose screws can create a fire hazard!
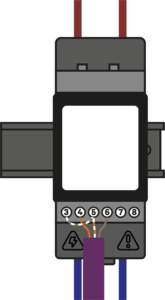
- Install the STP communication cable according to the diagram.
- Finally, install the last cable cover to secure your installation. If applicable, seal the covers with the cables according to local regulations.
IMPORTANT: DO NOT use one twisted pair for each connection — Untwist the cables before connecting them separately. You may use a cable off-cut to perform the loop between positions 3 and 5.
Wiring the charger
- Wire your charger following the instructions of your charger’s installation guide.
Termination resistance activation
- Pulsar Plus, Commander 2 and Copper SB have two different termination resistances. The one devoted to MID and PB meters is marked as “RS485”:
- For BUS LINE INSTALLATION: place the charger’s RS485 switch in the T position. Only the POWER BOOST meter has to be wired to the resistance termination.

- For TWO LINES INSTALLATION: place the charger’s RS485 switch on NT position and wire the termination resistance bridge to both the PB and MID meters.

Current selector configuration
- The MID meter is correctly installed. You now need to configure it through the myWallbox App, following the explanations in the next section.
4. Configuring the MID meter through the myWallbox App
- Download and open the myWallbox app.
- Log in to the app by filling in your credentials, or register if you do not have an account yet.
- Link the charger to your account.
- To ensure that the steps below run smoothly, ensure your charger and myWallbox app run the latest version available (you can check the app version in your Play Store or App Store and the software version in the Release Notes section).
- Select your charger from the list.
- Connect to your charger via Bluetooth.
- Go to Settings.
- Go to Upgrades.
- Tap MID Meter.
- Enable the toggle button.
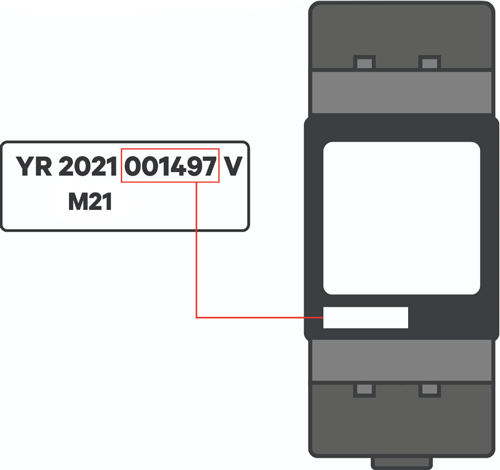
- Enter the serial number of your MID Meter, it must be entered without the letter at the end (you can find the SN below the screen of your MID power meter).
- If it does not match, it will not be allowed to be configured.
- If it matches, the field will not be editable.
- If the MID Meter is replaced, the field will be marked in red and editable.
- If the serial numbers of the MID and the charger do not match, the status of the MID Meter will be “Enabled — MID not found”.
- Choose between Energy used per hour (kWh) or Time to auto-stop the charger if the MID connection is not recovered.
Indicative values for this configuration:
- Default value kWh: 1 kWh
- Default value min: 1 min
- Max value kWh: 22 kWh
- Max value min: 60 min
- Save the settings. Your MID meter is correctly configured.
You can verify that your MID meter is configured correctly in the myWallbox web portal: https://my.wallbox.com/login
When correctly configured and your charger is connected to the Internet, the MID meter icon will appear next to your charger’s name:
 C
C